Menus are an important part of your WordPress site’s navigation. They allow visitors to easily find the content they’re looking for. WordPress supports multiple menus, and you can create custom menus that include pages, categories, links, and more.
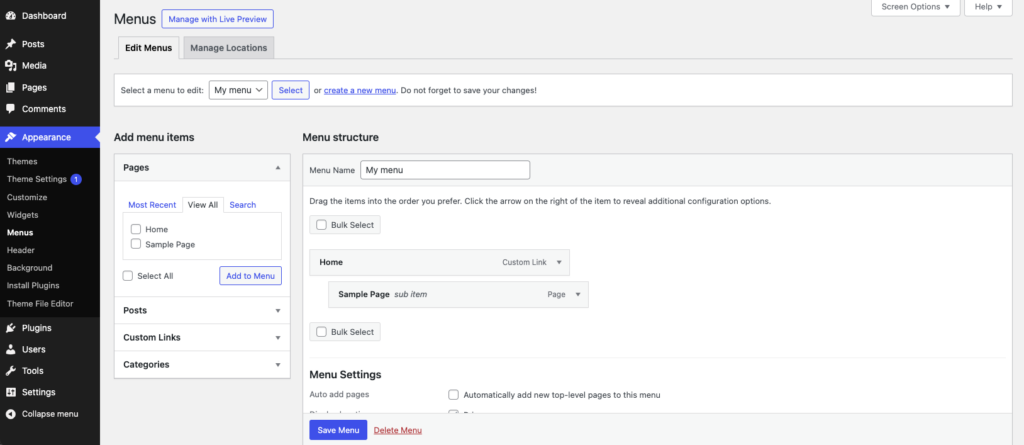
Finding the menu page
- Go to the Appearance menu in your WordPress dashboard.
- Click Menus.
Creating a New Menu
To create a new menu, click on the “create a new menu” link at the top of the screen. Give your menu a name, and then click the Create Menu button.
Adding Items to Your Menu
Once you’ve created your menu, you can start adding items to it. You can add pages, posts, categories, custom links, and more. Simply select the items you want to add from the left-hand column, and click the Add to Menu button.
Rearranging Menu Items
To rearrange the items in your menu, simply drag and drop them into the order you want. You can also create submenus by dragging an item to the right of another item.
Editing Menu Items
To edit a menu item, click on it to expand its settings. You can change the label, URL, and other settings for each menu item.
Saving Changes
Once you’ve made your changes, be sure to click the Save Menu button to apply them.