- Log in to your WordPress dashboard.
- From the left-hand menu, go to “Appearance” and select “Customize.”
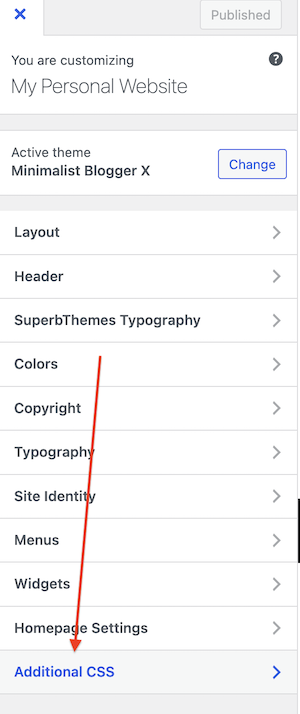
- In the Customizer, you’ll see a list of options on the left-hand side. Look for the “Additional CSS” option and click on it.
- Once you click on “Additional CSS,” you’ll see a text box where you can add your custom CSS code.
- Add your custom CSS code to the text box. Make sure to use proper CSS syntax and structure.
- Once you’ve added your custom CSS code, click on the “Publish” button to save your changes.
That’s it! Your custom CSS code will now be applied to your WordPress website.